Showing posts with label Valentine's Day. Show all posts

Tuesday, February 7, 2017

Be My Valentine Series - Day 9 - Bookmark Cards

Today I wanted to share with you an idea using a sketch from Scrapbook and Cards Today.  This is their challenge sketch for February and I thought it would be perfect for bookmark cards!  These cards are perfect for Grandparents, parents, aunts or uncles for any occasion and Valentine's Day is no exception!
SCT_WI16_Card2

The important thing to remember about a sketch is that it is meant to be a starting point but if you want to CASE it completely that is okay too!  Sketches are a great way to get your creativity flowing.  I followed the sketch pretty closely on these card but tweaked it to work with the supplies I had on hand.  I created two cards; one more manly and the other a bit more feminine.


These adorable bears were colored with Staedtler Watercolor Pencils, Zig Clean Color Real Brush Markers, and Prismacolor Premier Colored Pencils.  I was going for a specific look with these images; I wanted them to look like illustrations.  The bear stamp sets are Cub Cuddles and Bear Hugs both from Mama Elephant.

The cards are just basic white side folding cards.  The patterned paper is from Lawn Fawn's Polka In The Meadow Petite Paper Pack (note:  I backed each bookmark with the same paper as the card front) The epoxy hearts, washi tape and red twine are from my stash. The green hills were all cut from one piece of watercolored paper using the Mama Elephant Hillside Cover die. I used some thin but strong double sided tape on each side of the extra little hill on the card front so I could slip the bookmarks into them yet keep the bulk down.

I know my Mom will be really excited to get this card!  Let me know if you end up making any of these cards, I would love to see them!

Wednesday, February 1, 2017

Be My Valentine Series - Day 6 - Darling Deer


I am enamored with images that have a mid-century modern feel and these deer from the Kitsch Christmas Stamp Set by Caryn Davies for Avery Elle are right up my alley!

I was browsing through cards on my Pinterest boards and I came across this gem by Caryn Davies!  I think these deer are slightly flirty and therefore perfect for a Valentine's Day card so I grabbed one from my CCC "Colored Critters Cache"  (I colored a ton of these around Christmas time so I had a few leftover, yes, I REALLY love these deer!) and I set about recreating this card with a romantic feel.

I used the My Favorite Things Die-namics Stitched Mini Scallop Circle Stax and the Die-namics Inside & Out Stitched Circle Stax to create the base of my focal point. Next I used a stencil brush to blend some Festive Berries Distress Ink on the inner white circle. I used Avery Elle Laurels Stamps and Dies to create the flower and leaf accents around the edge. They were all stamped with various Altenew Inks (Cotton Candy, Ruby Red, Coral Berry, Peach Perfect, Frayed Leaf and Forest Glades).

After laying everything out in my MISTI I positioned the little starburst stamps and stamped them with Versamark and heat embossed them using Ranger's Princess Gold Embossing Powder, this is my favorite gold powder.  I then stamped my greeting from Avery Elle's Fabulous Florals Stamp Set and heat embossed that as well.  Finally I assembled all of the pieces together and Voila, Darling Deer!

I will be back with a post featuring Lunch Box Love Notes!

Thursday, January 26, 2017

Be My Valentine Series - Day 5 - Minimal Cards


Today's cards use minimal supplies, minimal time and mini stamp sets to help you send big love!  Each of these cards uses the following supplies:

It only took about 10 minutes to create each card; I definitely became faster as I went too!  

  1. Place your sentiment stamp on an acrylic block and fill the white card panel, using the lighter of the two ink colors, leave room in between the sentiments for a cute heart!
  2. Stamp your hearts in between each sentiment with the darker ink color
  3. Adhere your card front to the matching card base.
  4. Place your circle die on the darker piece of cardstock and tape in place, now center your heart die inside the circle and tape in place, run through your die cutting machine!
  5. Remove just the circle die from the darker paper and place on your lighter paper and cut one circle
  6. Place the lighter circle on the adhesive sheet, rub well to transfer the adhesive and remove the cover sheet exposing the adhesive, adhere the darker circle with the heart on top, your negative heart shape should now be sticky!  
  7. Place a pinch of glitter inside the heart and burnish it onto the adhesive with your finger, brush off any excess with a large dry paintbrush.
  8. Using foam tape, or squares, attach the circle in the middle of the card front.
  9. Stamp your images and color.  Cut your images and adhere to the card front overlapping the circle edges.
  10. If you want to place an epoxy heart in the center of the glittery heart!

Saturday, January 21, 2017

Be My Valentine Series - Day 2

Today's card is guaranteed to bring a smile to your dearest friend's face when they see these adorable bunnies from the Pix's Favorites stamp set by Mama Elephant!


This card was very simple to put together.  I began by stamping the Pix images with Ranger Archival Ink onto Canson Fanboy paper ( this is my favorite paper to use with Zig Clean Color Markers)  as you can guess I colored them with my Zigs and used a wet paint for blending. I did add a bit of sparkle with my Wink of Stella Clear to these cuties and once they were dry I fussy cut them leaving a white border to help them standout from my background.

I knew that I wanted to use a thought bubble so I stamped one from Lawn Fawn with Hero Arts Unicorn ink and heat embossed it using Hero Arts White Satin Pearl embossing powder.  I used the coordinating dies to cut these.

For the background I did some quick watercolor with Distress Inks on watercolor paper.  I die cut that with the Mama Elephant Hillside Cover Die and then trimmed off about 1/4" to allow for a white border on the card front.

I will admit I was so excited to put this card together that I adhered everything and then realized I forgot to stamp my sentiment!  (I had to remove the mouse pad from my MISTI due to the fun foam I had used being the background but it still worked perfectly, love that tool!)  The sentiment is from Concord & 9th was heat embossed using a white embossing powder from my stash. 

Quick, simple and oh so cute!

Thanks for stopping by, see you tomorrow to share some more happy heart day fun!

Friday, January 20, 2017

Be My Valentine Series - Day 1

We are closing in on the end of January which means Valentine's Day isn't too far away!  I have always loved Valentine's Day, doing the mailboxes and classroom Valentine's as a kid, roses and chocolates as I got older and then helping my kiddos with their Valentine's as a Mama Bear... I love it all!  In the spirit of love I am going to share ten Valentine's Day cards with you, one each in the coming days, some feature new to me techniques (like today's card), some will be for your Love and others for your little love bugs.  I hope you'll find something to inspire you to create a card for your sweetie!


Let's get started... today's card features ink smooshing (yes, that is the technical name!) to create a fun background!  I have been trying this technique out for the past week and I found these two video tutorials to be really helpful... Kari Webster and Laura Bassen... make sure to check them out!  I really want to say 'Don't get frustrated!' it took me quite a few tries with all different supply combos before I was happy with my smooshed panel. 

Ink Smooshing Supplies:
Distress Inks 
Ranger Spray Bottle 
4x6" piece of acetate (I used some old packaging)
Ranger Watercolor Paper (I prefer the smooth side)
Paper Towels (I don't recommend Viva, they left lint on the project)

I did add a little extra flair by flicking on some Kuretake Gansai Tambi Starry Colors (Red Gold) to the background!

For my adorable Octopi I stamped them with Ranger Archival Ink in Jet Black onto Ranger watercolor cardstock. I then colored them in with Distress Inks and then went over them with my clear Wink of Stella, I can't resist the sparkle!  I cut them out with their coordinating dies once they were truly dry.

I really felt that the Octopi needed a 'landing spot' on the card and as I thought about it I saw this card on my desk and I decided that a heart shaped shell wreath would be perfect!  I stamped the shells from Life Is Good onto vellum with Hero Arts Unicorn Pigment Ink and then heat embossed them with white powder, finally I fussy cut the wreath and adhered it with tiny dots of Ranger Multi-Medium Matte.

To assemble the card I adhered my smooshed background to a white card base.  I laid out my greeting in my MISTI stamping tool and stamped it next to the wreath with Momento Tuxedo Black Ink.  I applied some foam adhesive to my octopi and placed them over the wreath ( I love how they are holding tentacles!) and Voila! a finished card!

Thanks for getting all the way to the end of this post, I hope you come back tomorrow for another Valentine's Day card!


Tuesday, January 3, 2017

You've Got Mail

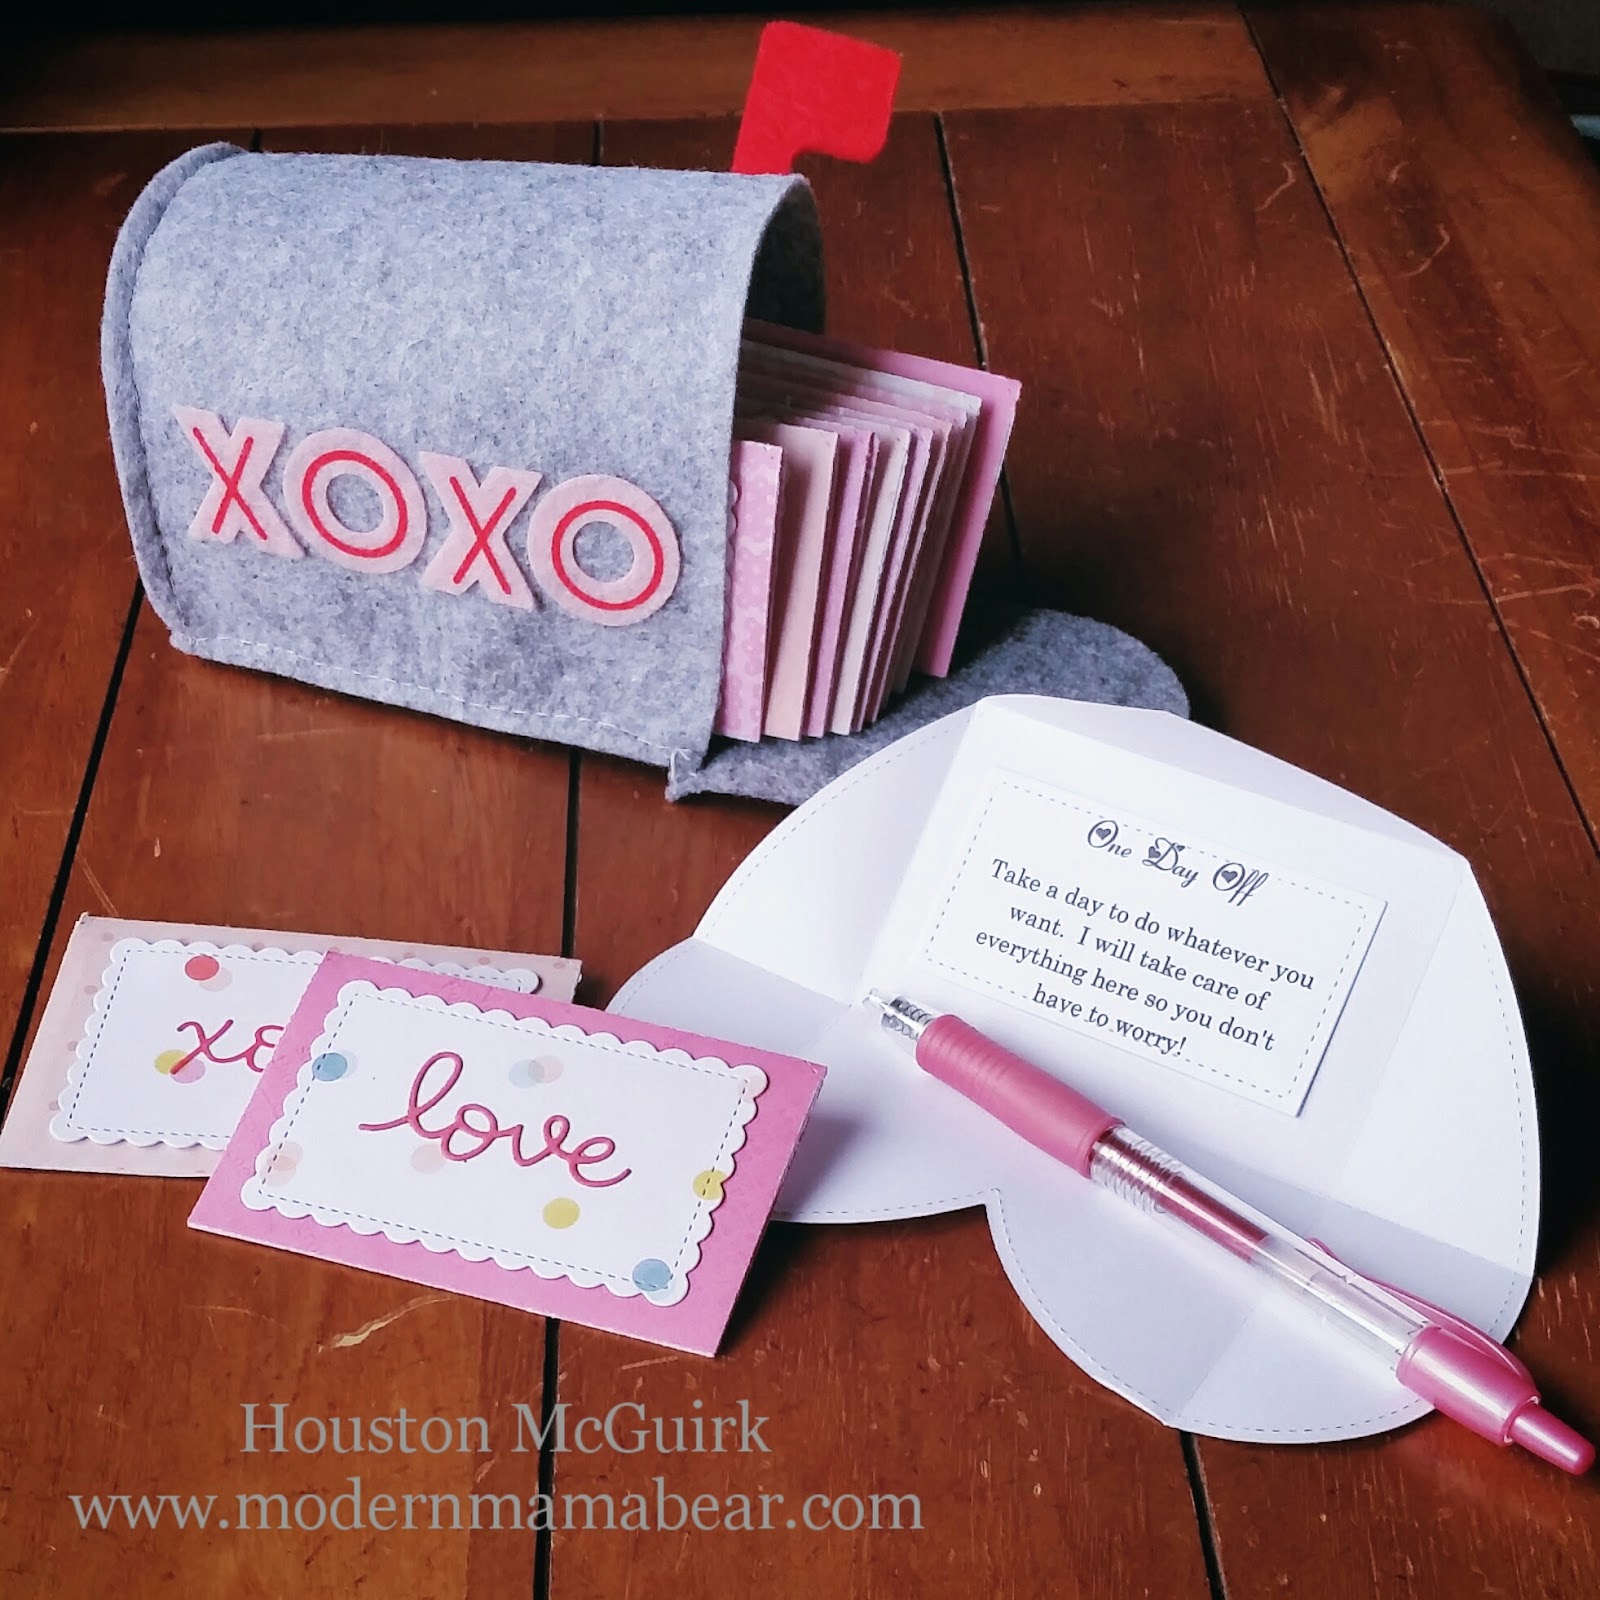
Okay, okay, I know the title is super cheesy but I'm a sucker for cheesy movies, puns and titles!  With the idea of cheesy romance in mind I wanted to share with you these super cute Valentine's Day Coupons that I made for my hubby using the new Lawn Fawn Valentine's Day Release.  As soon as I saw the Stitched Heart Envelope I knew I wanted to make these!

Please excuse the strange redness in the photo, 
it is snowing outside and I had the toughest time getting 
a shot that wasn't too blue!  I will try and get some better photos posted soon!

I began by cutting a dozen of the Stitched Heart Envelopes out of some mid-weight patterned paper in my stash (I believe these are all from a Dear Lizzy release).  I really hate to waste any of my pretty papers so I cut them to 7" x 12", held up the die and cut outside of the die to make two envelopes out of each piece.  Next I cut 12 of the cute scalloped tags out for the front using a fun polka dotted paper, and then the sentiments using a red paper all from the same Dear Lizzy collection.  After folding all of my envelopes I adhered the labels to the fronts with glue dots.  I ran the sentiments through my little Xyron sticker maker and adhered those.  On the envelopes where I used two heart dies (I had three)  I stamped some sentiments from the new Love Letters stamp set with Cranberry ink, they look like little candy hearts... seriously too cute!

To finish off my coupons I had to create the actual coupons... I just created a Microsoft Word document and came up with ideas that would be fun for my Honey (I would be happy to share after Valentine's Day).  I wanted the insides to be cute too so I cut each little coupon out with one of the dies from the Small Stitched Rectangles set.

I found this super adorable little felt mailbox in the $1 spot at Target and it is the perfect little container for these coupons!  For once I am actually super early and really excited to give him this Valentine's Day gift!

Happy New Year everyone!

Thursday, December 15, 2016

Whale You Be Mine

Valentine's Day will be here before you know it so I was really excited to find the Whale You Be Mine stamps and dies at my LSS Scrap2It. I rushed home and made a card with them during naptime☺


This card features the following products:
Lawn Fawn Whale You Be Mine Stamps and Dies
Lawn Fawn Mermaid Ink
Lawn Fawn Deep Sea Ink
My Favorite Things BG Wave Background
My Favorite Things Blueprints 27 (longer banner)
Versamark
White Embossing Powder
Copic Markers
QuicKutz 4x4 Heart with Scalloped Border (no longer made, sorry)

Thanks for stopping by, so sorry for such a short post, but my Littlest didn't sleep last night and I need a naptime today!